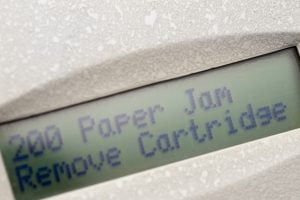
Top tips to remove and prevent a photocopier paper jam
What is a paper jam?
A paper jam occurs when a piece of paper is stuck or ‘jammed’ in a printer or photocopier. The user usually has to manually remove the piece of paper from the machine before the print job can continue.
 How does a paper jam occur?
There are many causes of paper jam, but it is mainly due to the paper. This can be if it is slightly curled, is stored in a slightly damp environment, is not the weight that was specified at print or is not loaded into the tray straight.
How do you remove a paper jam?
You should have received a guide to your machine when purchased, so consult this first to see if there are specific instructions on how to remove jams on your model. If there isn’t one, or you have misplaced the guide, follow these simple steps to help clear the jam:
1. Like with many technological errors, it is always wise to switch the machine off at the mains, and re-start. You might find that the jam will clear itself when the machine warms up.
2. If the jam doesn’t clear, but you can see the paper that is jammed, give it a gentle tug to remove it from the machine.
3. If you can’t see the paper, and your printer has a screen, it will probably tell you where in the machine the jam is (with images for easy location). The machine will give you basic instructions on how to get into the part of the machine that the jam is, and then tell you how to remove the paper.
4. If your printer doesn’t have a screen, you will have to do some investigation of your own, and look in the machine to see where the paper is jammed.
5. When you have found the paper, gently tug the paper to help guide it out of the machine, tug from both corners, so you don’t rip the paper. Some larger models such as MFPs and digital duplicators may have handles to turn that help to get the paper moving.
6. Once the paper has been removed, open the paper trays, and make sure that the paper is all aligned and not curled, wrinkled or creased – replace with fresh paper if the paper is not perfect.
7. Before the print job restarts, you may have to press a button to let the machine know that the jam has been removed.
How can you prevent paper jams occurring in the future?
1. Always only use one kind of paper in the tray at any time.
2. Check with the documentation that came with your printer (or do a quick Google search) to find out what the maximum and minimum paper weights your machine can handle. Never use paper that is too heavy, as it will get stuck.
3. Ensure you have selected the correct paper thickness / quality in the print controls on your PC before you start the print job.
4. Always store your paper in a cool, dry place. If any moisture gets into the paper, it is likely to cause it to stick together, meaning multiple sheets of paper can accidentally get fed through the machine, causing jams.
5. When you add paper to your machine, ensure that the paper is not curled, wrinkled or creased, and is all aligned, using the moveable guides within the paper tray.
6. Do not overload the paper trays. There are usually guides within the tray, with a ‘fill to’ line for guidance.
7. Never open the paper tray while printing is in process – this will disrupt the print job and is likely to lead to mis-feeds and paper jams.


